Server installation
sudo apt update
sudo apt upgrade
sudo apt install mariadb-server
Root Access
sudo mysql_secure_installation
- Press enter to continue (no password by default)
- Then type “Y” to set a new password, and enter your own password, keep it simple to remember
- Now, press “Y” three times to:
- Remove anonymous users
- Disallow root login remotely
- Remove the test database
- And finally, press “Y” again to reload the privileges
Connect to Mariadb as Root
mysql -uroot -p
Once connected you can use all the usual Database commands like SELECT, CREATE, SHOW etc…
Creating new User on MariaDB
Keep all quotes as it is from below code and just remove <username> with something like sam, remove <dbname> with something like mydb, keep everything else as it is.
sudo mysql -uroot -p
CREATE DATABASE <dbname>;
CREATE USER '<username>'@'localhost' IDENTIFIED BY '<password>';
GRANT ALL PRIVILEGES ON <dbname>.* TO '<username>'@'localhost';
FLUSH PRIVILEGES;
Connect as new user to Mariadb
sudo mysql -u<username> -p
Configure Mariadb
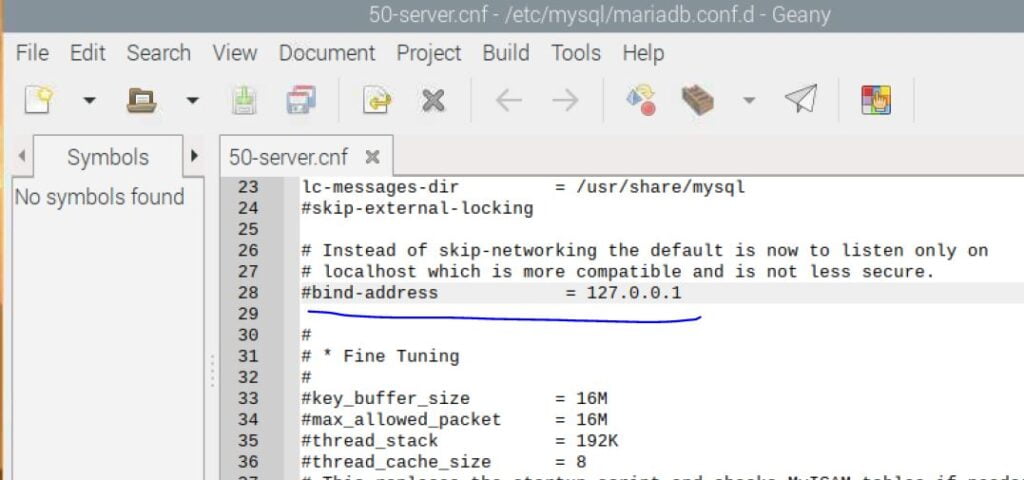
We want to access this database remotely from a windows computer, in order to do that we need to configure this database, for that, open the configuration file in a text editor like geany or nano and make changes to the property bind-address. You need to comment this line to allow connecting from any computer.
Read below excerpt from original documentation of mariadb here

sudo geany /etc/mysql/mariadb.conf.d/50-server.cnf
Go to below line and comment it by adding # in-front of the line like as shown in image below to allow remote access


